Antique Shops and Malls Are Great Places to Find Unique Home Decor

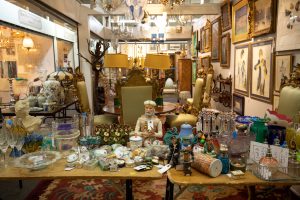
A day spent wandering antique shops and malls is a treasure hunt that many people love. The inventory at these unique venues changes regularly, so it is a good idea to visit often.

Vintage furniture consistently ranks as one of the top-selling categories at these types of venues. These pieces add character to a home and can be used for years to come. Visit https://www.gognasrl.it/antiquariato/acquistiamo-in-tutta-italia/stime-perizie-valutazioni-antiquariato-antichita-a-roma-lazio/ to learn more.

Antique Shops

Vintage furniture adds character and personality to a home that’s often missing in modern designs. It can also be more affordable than the newer, mass-produced pieces available in most stores. For example, a well-made, solid-wood dresser from the 1920s can cost less than a modern-looking version with only veneer and particleboard. Plus, it’s likely to last longer than the trendy stuff you can buy today.

Before shopping for antique furniture, decide what style you want to go for and take measurements of the space you’ll be using it in. Then stick to your plan while shopping so you don’t end up with a piece that doesn’t fit or one that is too large for the space. It’s also a good idea to rent or borrow a truck if you’re buying a larger piece of furniture to transport it home.

Many people misunderstand the terms “antique” and “vintage” when it comes to furniture, which can cause confusion when purchasing. While some dealers may use the terms interchangeably, they are different things. An antique is defined as anything over 100 years old. A vintage piece is anywhere between 80 and 100 years old.

To identify vintage furniture, check the wood for identifying marks or details like hand-cut dovetail joints and mortise and tenon construction. Other signs of quality include curved or inlaid woodwork, such as marquetry, and brass mounts on the feet or handles. Antique pieces will usually have a patina, which is a natural coloration that forms over time from metals, wood and other materials as they are exposed to the elements.

Other factors that affect the value of vintage furniture are era and rarity. Furniture from iconic designers or manufacturers will generally be priced higher than those made by lesser-known makers. Also, the condition of a piece can increase or decrease its value. Minor wear and tear is expected, but extensive damage can significantly devalue a piece.

It’s also important to remember that trends in vintage furniture evolve just as quickly as they do with new furniture lines. Look for furniture in an enduring design that won’t date as quickly as those fads of the day, or you could be stuck with a brown, floral-print sofa that will be relegated to the thrift store floor next year.

Vinyl Records

Many people are drawn to vinyl records for their rich, warm sound. They also offer a more tactile experience that’s hard to replicate with digital music. Whether you’re collecting for nostalgia or seeking a rare find, there are plenty of opportunities to sift through old vinyl at local antique shops. However, not all vinyl is created equal. Understanding the different types of vinyl can help you decide which ones to buy and which ones to pass on.

Most vinyl records are made of black, but sometimes they’re produced in bright colors for aesthetics or promotional purposes. This type of vinyl is typically not as collectible as black vinyl, but it’s still worth checking for when crate-digging at antique stores.

Another important way to distinguish one type of vinyl from another is by its playback speed, measured in revolutions per minute (RPM). This usually correlates with record size — larger records have faster RPM — but it’s not always the case. A quick look at the dead wax area of a vinyl record should reveal this information, which is vital to collectors.

A unique identifier etched into the dead wax of a vinyl release, used for cataloguing and inventory purposes. This identifying mark is often important to collectors, and it can make the difference between a common vinyl release and an exclusive edition that increases in value over time.

Occasionally, a vinyl record will feature images embedded in the playing surface, which makes it more visually appealing. These records aren’t as common as black vinyl, but they’re worth looking for if you want to add some extra flair to your collection.

Despite their recent resurgence, vinyl records are not as easy to come by as they once were. You’ll need to keep an eye out for new releases at your local antique shop, as well as attend record fairs or other music events to score some rare finds. Aside from ensuring that you have an eclectic selection of vinyl, attending these events can also give you a chance to meet other collectors and discover some hidden gems.

Home Decor

Antique pieces can add so much to a home’s design aesthetic, adding character and a sense of history. Whether it’s a boldly painted dresser or a wood-panel floor screen, antique room decor can transform the look of a space with its rich details and unique charm.

While trends do come and go, certain vintage pieces will always be in style. Here are a few things you should keep an eye out for when shopping for home decor at an antique shop.

Choosing the right antique home decor is all about finding a style that fits with your personal taste. If you’re drawn to rustic design, a handmade crate can make the perfect accent piece for a living room or bedroom. If you prefer a more refined aesthetic, a vintage-inspired lamp can provide a sophisticated look to any space.

Another way to find the right antique home decor is to visit a vintage-themed marketplace. These websites offer a vast selection of preowned furniture and home accents that can add an elegant, one-of-a-kind feel to any space. Some of these websites also allow you to search by a particular style, such as mid-century modern or rustic farmhouse, to help you find the best options for your taste.

If you’re looking for the perfect piece of antique home decor to complement a specific style, you can often find it at an Etsy marketplace. Popular sellers like Gallivanting Girls offer a wide selection of vintage and antique items that span decades and design styles. This Brooklyn-based shop features everything from Danish Modern armchairs to ’60s porcelain hanging lanterns.

Other sites, such as the online store of Golden Lotus, specialize in a specific genre of home decor. If you’re in the market for Asian-inspired accents, this popular seller can provide you with a variety of beautiful and useful items. From rattan ring stands to hang kitchen towels on, to Asian-inspired cookware and utensils, this Etsy seller can help you upgrade your home’s design with the perfect finishing touch.

While it’s possible to find a few special pieces of vintage home decor at most local antique shops, an actual mall is the best place to shop for antique room furniture and accents. These locations typically feature multiple dealers in one large space, allowing shoppers to browse for their ideal home decor from different stalls. Many of these spaces also partner with movers and delivery services, which can be a lifesaver if you’re dealing with larger pieces of furniture.

Sustainability

When people think of sustainability, they often associate it with environmentalism and protecting the planet from pollution. However, there are many facets to the concept that are equally important. At Penn State, we see sustainability as a holistic concept that encompasses human and ecological health, racial equity and social justice, secure livelihoods, and well-being for all now and in the future. This understanding is reflected in our approach to sustainability in the STARS rating system.

Upcycling old furniture and even restoring treasures found in other people’s trash – also known as dumpster diving – is one way that vendors at antique malls are promoting sustainability. Many of these items would otherwise end up in landfills, where they will remain forever.

Another way that antique malls are promoting sustainability is by helping to keep local economies vibrant and providing jobs. This is done by attracting visitors to the area and encouraging them to shop, dine, and stay for longer periods of time. These activities can also help to reduce carbon emissions, which are harmful to the environment.

Some of the best-selling items at antique malls are vintage clothing and accessories, which offer a unique style that is often more durable than modern clothing. These items are also a great alternative to fast fashion, which is often made from less sustainable materials and is detrimental to the environment.

While there are many benefits to buying and selling vintage goods, it can be difficult for new dealers to succeed without the proper guidance and training. Trying to learn the ins and outs of the business on your own can be time consuming, frustrating, and ineffective. This is because the Internet is full of contradictory ideas and lessons from beginners, who more often than not are sharing incorrect information.

In order to avoid these mistakes, aspiring vintage and antique dealers should seek out a comprehensive, proven business course that can teach them the ins and outs of the industry. This way, they can avoid the pitfalls that many people encounter and have a much higher chance of success.

Skyward Renewal: Innovative Practices in Modern Roof Replacement

Roof Replacement starts with detailed climate adaptation analysis for precise material choice. Every region now demands roofing that responds to wind, rain, and solar intensity. Technicians use weather simulation software before work begins. The goal is a roof tailored to long‑term conditions and exposure.

Roof Replacement

Project planning integrates drone-mounted thermal scanning to detect heat leaks under existing shingles. These scans guide insulation upgrades during replacement. Technicians map weak thermal zones accurately. Upgraded insulation reduces energy cost post‑installation.

Eco‑substrates are gaining traction beneath traditional shingles. These substrates absorb less heat and reflect infrared rays. They keep internal attic spaces cooler naturally. Replacement now includes reflecting layers as standard.

Custom panel cutting robots are used for accuracy. These machines match roof slopes exactly without manual error. Panels fit seamlessly even on complex roof shapes. It speeds up labor and minimizes material waste.

Waterproof membranes now include self‑sealing properties. When nails puncture during installation the membrane automatically seals around them. It reduces future leak incidents. This innovation boosts roof longevity.

Edge detailing uses ventilated drip edges with air pathways. These allow airflow under roofing edges preventing moisture buildup. Proper ventilation avoids mold and rotting over time. New replacements design air channels beneath drip edges.

Snow‑release coatings are applied on colder roofs. These mimic hydrophobic surface tension so snow slides off safely. They reduce roof loading without mechanical removal. It protects gutters and lower roofing areas.

Replacement crews now install integrated moisture sensors in attic rafters. These sensors detect condensation or elevated humidity early. Homeowners receive alerts via mobile devices. Preventative action avoids structural damage.

Roofers now label seam intersections digitally. RFID tags attached under shingles store installation date and material batch. Future inspections can scan these tags for maintenance records. It increases transparency and traceability.

Replacement designs often feature modular solar-ready mounts. These mounts are pre-installed before placing shingles. It reduces roof penetration later. Future solar installations become plug‑and‑play.

Interior attic lighting is planned before roofing. Skylights and light tunnels are placed using digital modeling. Light paths avoid shading effects and improve brightness. It increases living space value as well.

Repair and replacement crews now test wood deck surfaces with moisture meters before overlay. If moisture exceeds thresholds entire decking is upgraded. This prevents warping or mold under new shingles. Replacement includes substrate health checks.

Fiber-infused underlayment is replacing felt layers. It’s tougher and resists punctures from tools or weather. It binds tightly and resists tearing. It complements modern roofing materials perfectly.

Replacement brackets for satellite and fixture mounts now withstand thermal expansion. They expand slightly without cracking surrounding tiles. This prevents anchor failures over time. The adaptive fasteners are tested in thermal chambers.

Flashings are now pre-formed metal pieces custom bent offsite. They match roof valleys precisely, reducing onsite adjustments. Seam crowding is avoided. This results in cleaner watertight joints.

Airflow modeling tools simulate convection beneath shingles. They calculate hot spots on roofs and propose ridge vent placement accordingly. Proper vent positioning extends roof life. Replacement plans now include airflow optimization.

Replacement crews now color-match shingles digitally on site. Cameras capture existing roof tones in lighting conditions. Matching shingle shades blend seamlessly. No mismatched patches ruin aesthetics.

Roof replacement now includes elastomeric sealants with heat-reactive curing. These cure faster in sunlight exposure. They seal joints without shrinkage. They remain elastic through temperature cycles.

Photovoltaic shield coatings now offer reflective shielding for skylights. They block UV while allowing visible light. They reduce heat gain through glass. Skylight replacement is both functional and energy‑ efficient.

Ice‑beam detectors are embedded along roof valleys. These detectors sense ice accumulation and trigger low‑profile heat strips. They prevent ice dams during freezing events. Homeowners avoid typical gutters overload.

Technicians now orient replacement material to minimize tearing from wind uplift. Wind tunnel data guides shingle lay direction. Overlapping angles are optimized for wind zones. This reduces storm‑related damage significantly.

Nanotechnology coatings are applied to resist algae and moss growth. These coatings embed within the shingle surface. They degrade organic spores and keep roofs clean longer. Replacement includes these treatments as preventative layers.

Structural reinforcement under roofing now includes flexible metal bracing. This supports high seismic or storm zones dynamically. Brace systems absorb roof movement. This innovation protects against shifting during extreme events.

Replacement crews now use laser leveling to verify slope gradient across edges. This ensures water drains uniformly to gutters. Poor drainage points are corrected early. Water pooling risks are dramatically reduced.

Roofs are now replaced with layered cooling vents under tiles. These vents promote convective cooling between the roof deck and shingle layer. The space reduces attic heat and lowers cooling bills. This becomes standard in replacement projects.

During tear‑off, dumpster liners capture debris dust for recycling. The material is then processed separately for shingles, wood, and nails. Landfill waste is minimized. Replacement includes recycling plans automatically.

Dynamic load sensors monitor live weight on the roof during replacement. These sensors alert crews if weight exceeds safe limits. Equipment placement adjusts accordingly. Prevents roof deck overstress during installation.

Rapid-curing adhesives are used under solar panel bases during replacement. These cure under UV in minutes. Crews can proceed quickly to final tiling. New adhesives reduce downtime in hybrid installs.

Liquid sealing beneath shingles is applied with robotic sprayers. This ensures even seal thickness without human variability. It covers valleys and roof hips uniformly. Consistent sealing improves durability significantly.

Replacement includes acoustic-absorbing liners under metal roofs. These liners dampen rain or hail sounds dramatically. They improve interior quietness. This upgrade becomes part of modern replace projects.

Flexible flashing membranes mold around chimneys and pipes better than rigid ones. They adapt to thermal shifts and seal tighter. They prevent water entry even during settling. Replacement includes contour adaptive flashing.

Inspection crews now check wood deck density using ultrasonic probes. These probes detect internal rot without drilling. Weak zones can be replaced selectively. Substrate preservation improves overall structure.

Replacement scheduling incorporates weather forecast APIs. Crews plan tear‑off and installation during weeks with ideal drying conditions. Rain‑checks avoid moisture traps under new shingles. Installation success rates improve.

Synthetic ridge caps replace traditional ridge shingles. These caps flex with roof shape and resist cracking. They interlock tightly to resist wind lift. Replacement includes these for improved ridge longevity.

Gutter interface is upgraded during roof replacement. Seamless metal gutters are welded directly to drip edges. This avoids leaks behind fascia boards. Water management becomes integrated with the roof system.

Solar fan tunnels are embedded within roof deck replacements. These fans activate when attic temperature exceeds threshold. They pull hot air upward through roof vents. Attic ventilation improves automatically post replacement.

Rapid documentation tools now create digital walkthroughs of replaced roofs. Photos, notes, and sensor readings compile into client reports. Clients review installation steps virtually. Transparency becomes part of premium service.

Builders now offer replacement warranties indexed to climatic zones. Warranty covers thermal expansion, wind lift, and hail impact conditions specific to region. Coverage adapts to expected weather events. This elevates client confidence.

Replacement crews now wear ambient‑cooled safety gear. HVAC‑chilled vests keep technicians comfortable in hot weather. Productivity remains high during sunny installations. Worker safety improves without losing pace.

Bi-color shingle gradients are used in replacement designs to match fading patterns. Crews blend lighter and darker tones for natural look. The effect hides age‑related discoloration. New roofs appear organic, not overly fresh.

Illustrated removal plans show roof sequencing to clients visually. These plans help clients track which sections are torn off when. It reduces anxiety and improves clarity. Communication becomes part of premium roof replacement.

Solar rainwater channels are installed with replacement work. These channels direct runoff into storage tanks. No downward scattering stains façade surfaces. It combines roofing and water management into one system.

Future‑proof replacement includes wiring conduits for roof sensors. These include temperature, tilt, and leak detectors. They connect to home automation hubs. Maintenance becomes predictive and proactive.

Roofing now adapts with smart edge strips that indicate uplift risk visually. These strips change hue if wind pressure is too high. Homeowners see signs of potential damage early. Checks before storms reduce emergency repairs.

HAL‑grade coatings add glare reduction to metal roofs. They reflect intense sunlight without heating the surface. Visual glare is minimized while thermal impact stays low. Replacement includes these finishes for comfort and efficiency.

Roof replacement today balances aesthetics, energy, resilience, and monitoring. Each phase integrates technology, sustainability, and precision execution. The result is a roof that performs far beyond expected duties. It becomes a long‑term asset not just shelter.

The Full Roofing Installation Process

Roofing is the silent guardian that protects your home from the elements. A well-maintained roof can increase your home’s value and save on heating and cooling costs.

Roofing

The foundation of your roof is a frame of rafters or prefabricated trusses. Sheathing covers the joists and is usually made of plywood or oriented strand board. Visit https://www.jmelitecontractors.com to learn more.

There are many different roofing materials out there, and each one offers something unique. The best material for you will depend on a number of factors, such as your budget and how long you plan to live in the house. Some of the most durable roofing materials include slate, wood, and metal. These can last for 100 years or more, making them a good investment. Other factors to consider are aesthetics and maintenance requirements.

Asphalt shingles are the classic roofing material found on most homes in America. They are affordable and easy to install, but they do not offer the same longevity as other materials. Metal is a great roofing option for homeowners who are looking for durability and curb appeal. This roofing material is fire resistant and can withstand high winds. It is also easy to repair and replace if necessary.

Concrete and clay tiles are another popular roofing material that offer beauty and durability. These are made from earthen clays molded into rolled or interlocking shapes and then fired for strength. They are ideal for hot climates and can withstand hurricane-force winds, earthquakes, and other extreme weather conditions. However, they are more expensive than other roofing materials and can add a lot of weight to a roof, which may affect its structural integrity.

Rubber is another highly durable roofing material that can be made to look like other more expensive roofing materials, including slate and shake. It is also an eco-friendly option, made from engineered polymers combined with recycled plastic and rubber. However, this material can have a distinctive odor that some homeowners might find off-putting.

Slate is a natural roofing material that offers unmatched elegance and durability. This beautiful roofing material is often associated with historic buildings and elegant homes. Slate is expensive and requires a high level of maintenance, but it can last for over 100 years.

Installation

A home’s roof is its main shield against the elements. It’s important to maintain and repair this vital component in order to preserve the structure and prevent water damage. However, roofing is a process that involves more than just repairing and replacing existing materials. In this blog post, we’ll explore the full roofing installation process, from start to finish.

The first step of the process is to prepare the site. This includes covering landscaping and tarps to catch debris, as well as ensuring that the work area is clear of obstacles and that proper safety measures are taken. Once the site is ready, the contractor will begin removing the old materials carefully, while taking care not to damage underlying structures.

Once the old materials are removed, the underlayment can be installed. This layer acts as a second line of defense, preventing leaks even if the top material is damaged. Then, the shingles can be installed. The roofer will start at the bottom of the slope and work their way up, overlapping each row by six inches. The shingles are then fastened to the underlayment with close nails near the edge and spread out more towards the center. The contractor will also install a vapor retarder, which is designed to restrict the passage of water vapor through the roof.

Maintenance

Keeping the outer shield of your home in tip-top shape is a priority to help prevent water infiltration and other potential damage. Regular roof inspections should be conducted by trained roofing professionals on a routine schedule, but it is also important to address problems as they occur. Here are some of the main areas to look for:

Missing shingles

Loose or damaged shingles can lead to leaks. Look for granule loss, which exposes the asphalt layer and accelerates shingle deterioration. Clogged gutters
A clogged gutter can cause the fascia boards to rot and encourage moisture intrusion. Check the gutters for rust or debris and remove anything that is stuck.

Debris

Any gravel, dirt, leaves, twigs or other debris should be removed from the roof on a regular basis. The debris will retain water on the roof, which will promote moss growth and potentially leak into the building. Debris can also block field drains, leading to localized ponding and structural damage.

Flashing

Check the flashing around chimneys, vent pipes, skylights and exhaust fans for cracks or gaps. It is common for flashing to fail and leak due to weather events or storms, so it is important to inspect it regularly.

Leaks

Whether it is caused by wind, rain or snow, leaks can be quite destructive. They can rot roof decking, cause interior damage and even lead to costly mold problems. Leaks should be addressed as soon as they are noticed, so that the problem does not escalate.

If you have a large tree close to the roof, consider having it trimmed on a routine basis. Branches that hang low may break off during storms or natural disasters and damage the roof. They can also scrape the shingles and weaken shingle integrity.

Repairs

A professional roofer can identify areas of damage and repair them to prevent serious issues down the line. They’ll thoroughly inspect the area, carefully remove any damaged shingles and underlayment, and replace them with high-quality materials to ensure durability. They’ll also seal the replacements to prevent future leaks.

Roofing repairs are usually less expensive than roof replacement because they don’t involve extensive labor and material costs. However, the extent of the damage and your location will play a role in the total cost.

Small leaks and missing shingles are common problems that shouldn’t be ignored. Proactive repairs help you save money and protect your investment. Larger repairs can require a full tear-off and will usually require a permit. 

Pest Control and Museum Collections

Many museum materials are susceptible to deterioration by insects, fungi, and rodents. Threshold-based decision-making focuses on monitoring and minimizing damage to collections.

Plants with strong scents, such as lavender and lemongrass, are said to repel mosquitoes. Another easy natural pest control is to spray the area with hot water. Contact Pest Control Coquitlam BC now!

Pest identification is a critical first step in an integrated pest management (IPM) program. It helps you decide whether a particular pest needs control and what control measures are appropriate. It also lets you know whether you can avoid chemical treatments.

Pests can damage crops, gardens, buildings, and landscapes. They can also cause health and safety problems for people, pets, and livestock. They can also be carriers of disease and parasites. Pests are a major problem in homes and businesses and can be difficult to get rid of. Pests can be insects, weeds, plant diseases, or vertebrate animals such as birds and mammals.

Identifying pests is important because different species of the same pest look very similar and may have similar damage and impacts. Proper identification can help you distinguish between the many species of pests and decide how to treat them. For example, a specific coloration, the shape of a wing or other feature can help you differentiate between flour moths and Indian meal moths.

You can learn to identify pests by studying field guides, pest fact sheets, or by asking experts. You can also attend webinars and workshops or take advantage of online resources. When using an online resource, always check with at least two sources to ensure that you have a correct identification.

Many pests have different physical forms at various stages of their life cycle and during the season. Proper identification can also help you determine the best timing for treatment to minimize environmental impact.

Once you have a positive identification, you can begin monitoring and checking to see if the pests are still present and how bad the damage is. If you are unsure of the identity of a pest, consult with an expert such as a crop or forest specialist, your local Cooperative Extension agent or a Master Gardener, or the staff at your state department of agriculture.

Pest Prevention

Pest control focuses on reducing the number of pests in environments that are used by humans. This can be accomplished through exclusion, quarantine, repulsion or physical removal of the pests. Pest control is a vital part of hygiene management in commercial and industrial settings. It can help prevent diseases, reduce damage to buildings and products and reduce the annoyance of pests such as rodents, birds, insects and plants.

Many people use various non-chemical methods to control pests such as removing food sources, cleaning surfaces and sealing cracks and crevices. Other types of pest control include introducing natural enemies to a habitat or using barriers like fences and screens. Chemical pesticides may also be used in some situations to control a pest problem when other methods fail.

Despite the best efforts of building owners, managers and maintenance crews to keep properties clean, pests can still occur in large numbers and disrupt a business or residence. When a pest population gets out of hand, it can result in property damage, health problems for occupants or simply be a distraction and nuisance.

Preventing pests is much easier than controlling them after they have established a presence. It is important to identify a pest and its environment carefully before choosing a control method. Knowing the habits of the pest can help choose the best treatment option, including traps, barriers or targeted sprays. Whenever possible, use natural methods to control pests rather than pesticides, as they have less impact on the environment.

Hospitals and other health care facilities are especially sensitive to pest issues because rodent and insect intruders can carry real disease threats for patients and staff. They can also hurt a facility’s reputation for quality. That is why it is so important for EVS managers to transition to an integrated pest management (IPM) approach.

Using IPM will help reduce the need for pesticides by identifying and eliminating the conditions that allow pests to thrive. This can include reducing food sources, removing overwintering sites or closing off shelters. Preventing cockroaches, for example, requires keeping trash cans tightly closed and removing places to hide. Clutter provides hiding spots for the pests and can also harbor feces, which can spread diseases.

Pest Control Methods

Pest control methods include natural, biological, mechanical, and chemical controls. Natural controls such as weather or topography limit pest populations by making environments unsuitable for them. Biological pest control uses predators and parasites to eliminate pests. Chemical pest control involves using toxins to destroy insects and other organisms. Chemical controls are typically easier to use and work faster, but they can also pose health risks to people and damage the environment if used incorrectly.

Before using any pest control method, it’s important to evaluate whether a pest problem exists and what the best approach should be. Pests can disrupt human activities and cause economic or environmental harm. They also can displace native species and alter the quality of soil, water and air, affecting terrestrial and aquatic ecosystems. Pests can cause damage to plants, buildings, food stores, lawns, and gardens. They can devalue homes, restaurants, farms and other business.

Monitoring means checking a field, landscape, forest, or garden to see what pests are present and how much damage they have done. Monitoring can help you determine if a pest infestation is serious and needs to be controlled or if the pests can be tolerated. Monitoring can also allow you to track the effectiveness of your management strategies.

A common way to tell if there is a pest infestation is by examining the area for signs of infestation, such as rodent droppings and insect larvae. These can be hard to identify, but observing where the pests are and what they look like can help you determine whether the problem requires professional pest control.

In addition to examining the physical evidence of pests, it’s important to assess the situation and the environmental factors that have led to the infestation. For example, improperly managing a landscape or agricultural field can create conditions that encourage pests, and removing or eliminating those conditions can help reduce the need for pest control.

Another important step is to choose a strategy that will prevent pests from becoming a problem in the first place, or that will suppress the growth of unwanted pests or their numbers to an acceptable level. Prevention includes strategies such as pest proofing, which involves sealing the exterior of your home or business, removing rotten wood or trash, and keeping grass and vegetation well-maintained. Another effective preventative measure is to spray your yard or garden with beneficial nematodes, such as the cockroach-eating nematode Steinernema carpocapsae.

Pest Control Cost

When it comes to pest control, there are many factors that can affect the cost. For example, some types of pests are easier to get rid of than others. It typically costs less to treat a home for insects like ants and cockroaches than it does to eliminate a severe termite infestation or remove bed bugs from a home. Other factors that can impact pest control cost include the amount of collateral damage caused by the pests and the type of treatment needed to address the problem.

The amount of time required to complete a pest control service can also influence the final cost. For instance, it may take longer to treat a large home than a small one. This can result in higher labor costs.

Ultimately, the most important factor in determining how much to charge for your services is the type of pest you are treating. You should not offer consumers “one size fits all” pricing plans. Instead, provide a variety of options, including yearly protection plans that are cheaper than individual treatments.

For preventive pest control, it is generally more cost effective to charge for a monthly visit rather than for an individual treatment session. This allows you to charge a lower rate while still providing your consumers with the level of service they require.

When presenting your pest control estimate to a consumer, be sure to include all of the necessary details. This will help to ensure that the customer understands exactly what is included in the final price and how the costs were determined.

Additionally, make sure to clearly explain the benefits of your services. This can be especially important when selling a preventive pest control plan. For example, you can mention that pests such as ants, cockroaches, fleas, and bed bugs can cause health problems for individuals with allergies or asthma. On the other hand, termites and carpenter ants can significantly damage a home’s structure and increase its insurance premium. As such, the benefits of your pest prevention service can be far-reaching for the consumer.

Painting The Inside Of Cabinets Is Easy And Inexpensive

While Painting Inside Of Cabinets are personal decisions, many homeowners choose to do it to add a fresh look. For a durable finish that can hold up to everyday wear and tear, an alkyd-based paint is the best choice.

Cabinets

Begin by removing doors and drawers from their hinges. Place the hardware in labeled bags to make reattaching them easier.

Cabinet painting is a fairly easy and inexpensive way to give your kitchen a makeover. Most home improvement magazines, books and websites offer a lot of basic how-to tips. But what they fail to tell you is that proper surface preparation is the key to a successful cabinet paint job, inside and out. If you skip the prep work, you may be left with flaking or peeling paint, and if that happens, you’ll have to strip everything down to bare wood and start from scratch.

Before starting the actual painting process, clear out all contents of your cabinets. Usually, you don’t have to empty the drawers and cupboards, but if they are filled with food or cans of whatever, move them to a safe place where they won’t get in the way of your project. If you have to remove the hardware from the cabinets, make sure that you label each door and drawer so that you know where they go when it’s time to reinstall them.

Next, wash the cabinet surfaces and wipe them down with a degreasing cleaner such as trisodium phosphate (TSP) or a sponge. Be sure to scrub all corners and crevices. Rinse and dry all surfaces thoroughly. If your cabinets have a shiny finish, use 220-grit sandpaper to roughen the surface for better adhesion of the new primer and paint. Wipe down all surfaces again to remove any dust or residue.

It is also a good idea to cover your countertops, backsplash and floors with drop cloths or tarps to protect them from spills, drips and overspray. Using fans and keeping the windows open will keep the air moving, which will help the paint dry faster. Check the back of the can for the maximum recoat time; this is the amount of time that it will take for the paint to cure.

Once the first coat of primer is applied and has dried, apply a second coat. It’s important to let the second coat dry completely before applying the final topcoat, as this will help ensure a consistent and even color.

Primer

Whether your cabinets are wood or laminate, it’s best to prime them before you paint. This ensures that the new coat of paint adheres to the cabinet surface. Primer is also a great way to hide any minor blemishes and imperfections, making your final product look flawless. Before applying primer, scuff sand the cabinets to remove any sheen and create a smooth base for painting.

There are several types of primers available for kitchen cabinets, including oil-based, shellac-based, and water-based. Each has its own pros and cons. Oil-based primers provide a better seal and stain blocking properties, but emit strong fumes that require protective equipment and long drying times. Shellac-based primers are low in VOCs and dry quickly, but may not be as durable as latex or oil. Water-based primers are easy to work with and clean up easily, but they may not provide as good of an adhesion as oil-based primers.

If you are working with old or damaged cabinets, consider using a stain-blocking primer. These are particularly effective on cabinets with nicotine stains, water damage, or other severe discolorations. They are a great choice for anyone who wants their cabinet finish to last a long time.

Adhesion primers are ideal for slick surfaces like laminate or glossy paint, because they help to create a bond between the cabinet surface and new paint. They are usually a little more expensive than other types of primer, but can save you money in the long run by protecting your cabinets from peeling and chipping.

When choosing a primer for your cabinets, keep in mind that some products can take up to 16 hours to dry. To speed up the process, use fans and open windows to keep the air moving. Once your cabinets are ready, apply a second even coat of ADVANCE interior paint with a roller on flat surfaces and a brush for hard-to-reach areas. Wait at least overnight for the second coat to dry, and then sand with 220-grit sandpaper before finishing. This allows the finish to cure completely and prevents the topcoat from peeling or flaking prematurely.

Paint

Cabinet paint is specially formulated to stand up to the wear and tear of everyday use. It’s thicker than wall paint, providing extra protection against chipping and peeling. It also contains special adhesives that help it adhere to cabinet surfaces, which are often more slick than walls and can make it hard for regular wall paint to grip. Cabinet paints are available in a wide range of colors, and they’re designed to hide imperfections in the wood grain.

It’s important to select a high-quality cabinet paint for your project, as it will be exposed to more wear and tear than other surfaces in your home. Cabinets are often used for food prep, and they’re also subject to heat and moisture. The best cabinet paints will hold up to these conditions, and they’ll look beautiful for years to come.

If you’re not comfortable doing your own painting, or if you have a big project on your hands, consider hiring a professional. This will ensure that your cabinets are painted properly, and it will save you time and hassle. However, it’s important to do your homework before you hire a contractor. Look for a company with an excellent reputation and plenty of experience in the field.

When choosing a color for your cabinet doors, it’s recommended to opt for a satin or eggshell finish. This type of finish will be less noticeable than a glossy finish, and it will also be more forgiving when it comes to scuffs and fingerprints.

Before you start painting, it’s important to thoroughly clean your cabinets with a degreaser like TSP to remove grease and cooking residue from the surface. Then, sand the surface of your cabinets with a medium 300-400 grit sandpaper to smooth it out and create a clean canvas for your new coat of paint. After sanding, wipe down all surfaces with a damp cloth or lint-free tack cloth to remove any dust or debris.

It’s recommended to apply 2-3 coats of paint when painting cabinets. Allow each coat to dry fully between applications. It’s also important to follow the manufacturer’s instructions for drying times. Once the cabinets are dry, you can reinstall them and enjoy your newly painted kitchen!

Finish

Now that the cabinet interior has been lightly sanded, and you’ve applied your primer, it is time to apply your finish coat. Again, I suggest you use a high-quality acrylic latex paint for the best results. If you are sensitive to the stinky fumes from oil-based paint, consider using a water-based acrylic.

A good quality latex product will give you a smooth, durable finish that will stand up well to wear and tear. It will also hold up well to moisture and cleaning products. Use a velour roller for easy application to flat surfaces, and switch to a brush in the nooks and crannies. Make sure you have good air flow in your work area during this process, and keep the windows open.

There are many paint options for cabinets, from traditional oil-based paint to newer hybrid alkyds. Oil-based paints have a strong binder that makes them the hardiest choice for high touch areas, but they are difficult to clean and release volatile organic compounds (VOCs), which are not healthy for your kitchen. Water-based alkyd paints have become more common, and these are much easier to clean up, and they don’t release VOCs as quickly as oil paints.

For a durable, washable finish, I recommend you use a semi-gloss or gloss paint. It will be more durable than eggshell or flat paint and will hold up better against scuff marks.

After you have rolled the last of your ADVANCE interior paint onto the cabinet boxes and doors, let it dry thoroughly. This is an important step that can’t be rushed. Depending on the humidity, this can take 24 hours or more.

When the paint is dry, you can put back your drawers and shelves. I recommend waiting at least 8 hours before you start placing things back in your cabinetry, to allow the paint to fully cure.

It’s a good idea to label your cabinet doors and drawers before you remove them from the cabinet boxes, so you know where everything goes when it is time to put them back. It is also a good idea to use a damp cloth to wipe down the cabinets before you place them back in, just to make sure that they are clean and free of any residue or dirt.

Why You Should Hire A Full Basement Repair Company

When you need work done on your basement, consider hiring a full Basement Repair Naperville IL company rather than a general contractor. These companies prioritize customer relationships and offer long-term maintenance.

This homeowner was having trouble with water seepage through her basement walls. After installing 126 feet of interior drainage, a waterproof paneling system, and a dehumidifier, she now has a clean, dry basement.

basement repair

Foundation Cracks

Foundation cracks are usually a sign of structural damage, but not all cracks are the same. Deciphering which cracks are harmful can save you a lot of money and time, ensure emergent cracks are repaired ASAP, and help you track the overall stability of your basement walls over the long haul.

Hairline cracks are common in poured concrete foundation walls and usually don’t cause a major problem as long as they don’t grow wider or allow water to leak into the basement. They often appear days or weeks after a foundation is installed and are caused by the natural shrinkage of the concrete.

Wider, horizontal foundation cracks are a serious concern and can be a sign of shifting soil and sinking. They can be caused by several factors, including poor construction of the foundation’s footings, moisture problems, or subpar grading.

If you notice a horizontal or diagonal crack in your foundation, it’s essential to get it fixed immediately. The best way to fix these cracks is to use a concrete epoxy injection kit. Start by cleaning the area around the crack, then widen the gap slightly with a chisel or angle grinder to give the epoxy more surface area for better adherence. Then, inject the polyurethane product into the crack until it’s filled, and follow the manufacturer’s instructions for drying. After the crack is filled, paint over it to seal out any remaining moisture and protect the foundation walls from further damage.

Waterproofing

A little water in a basement is normal and acceptable, but too much can cause structural damage and create an ideal breeding ground for mold. Addressing the problem early is key to avoiding more serious and costly repairs down the road. You may be able to waterproof the basement on your own with DIY products, but consider calling in a professional for more complicated solutions like sealing wide or uneven foundation cracks or installing an interior drainage system.

Interior waterproofing keeps moisture out of the basement by applying a sealant to walls or floors. This can be done by professionals or as a do-it-yourself project, but it must be applied after the basement is dry to avoid trapping moisture that could lead to mildew or mold growth. A more permanent solution is epoxy injections that repair cracks and gaps in the concrete walls and floor of the basement.

Exterior basement waterproofing is more difficult and time-consuming, but it can be the most effective. It can be accomplished by removing flowerbeds, lawns, and other landscaping that could direct water toward the house, making sure gutters are working properly, and grading the yard so it slopes away from the home. Adding a sump pump to the basement and sealing concrete surfaces can also help reduce moisture in the basement. The first step is to test for moisture transmission using a moisture meter or vapor transfer kit.

Sump Pump Installation

Sump pump installation is a wise investment for homeowners who live in areas prone to flooding. Even in homes that have never flooded before, frequent rainfall and extreme weather can lead to water damage and other problems. Having a way to move the water away from your home will prevent your basement from getting flooded and help keep moisture out of the walls, preventing staining and peeling.

Your professional plumber will dig a hole in your basement floor to install the sump pit or pump basin. They will then line the pit’s walls with a waterproof membrane to ensure that the drained water doesn’t seep into the surrounding soil. They will also install an exterior discharge line to eject the drained water from your property. This will protect against groundwater seepage and prevent the drained water from putting pressure on your foundation.

Next, they will plug the sump pump into a GFCI-protected receptacle and test it. The float switch in the pump should activate when it reaches a certain level and then turn off when the water is removed from the pit.

A check valve should be installed between the pump and the discharge pipe to prevent the drained water from draining back into the sump pump. Once everything is in place and ready to go, they will cover the hole and the area around the pump with concrete.

Carbon Fiber Reinforcement

Carbon fiber reinforcement is a relatively new solution in the basement repair industry, but it’s a game changer. It’s known for its exceptional tensile strength, which can be used to stabilize and straighten bowing walls and foundations that have lost their structural integrity. It’s also durable and won’t corrode, which makes it the ideal material for basement structural repair.

Carbon-fiber-reinforced polymers (CFRP), or carbon fiber composites, are a combination of two different materials: carbon fibers for strength and a matrix of thermoset plastic, such as epoxy resin, to hold them together. CFRP is used in a wide variety of applications, including concrete reinforcement, where it can be used to increase the load-bearing capacity of existing structures and prevent further deterioration.

It’s also used for repairing and strengthening concrete structures and components, including bridges, tunnels, buildings, and other infrastructure. This type of structural repair is particularly effective because it’s done on-site and requires minimal excavation or disturbance to the structure’s surface.

Our carbon fiber basement repair services are done with extreme care and precision. The experts at our company first conduct a thorough assessment of the affected area to determine the extent of the damage and how it can best be addressed. Then, the appropriate carbon fiber strips are applied to the wall, creating a strong bond that strengthens and stabilizes the wall. The process is fast, convenient, and efficient, allowing us to complete the repairs quickly so your basement can be back in use as soon as possible.

Wall Anchors Or Braces

Wall anchors and braces are used to support bowing basement walls, a problem that occurs when expansive soil puts pressure on the foundation. This pressure causes the walls to curve inward like an archer’s bow and can damage the home’s structural integrity.

The best way to prevent this damage is by securing your basement walls with a dependable wall anchor system. Our expert technicians install these systems by drilling holes into the basement wall and connecting steel rods to anchor brackets on the inside of the wall. These anchors then connect to pins that are drilled deep into stable soil. These anchors transfer foundation pressure away from the basement, halting the walls’ inward movement and straightening them over time.

There are two types of basement wall anchors: helical tieback anchors. Helical tieback anchors are perfect for a basement with limited interior access because they can be installed without excavating the yard. These anchors look like a corkscrew and work by applying opposite pressure to cancel out the hydrostatic forces that caused your basement walls to bow in the first place. The PowerBrace system is custom-fit to the height of your basement walls and secured with a bracket that attaches to floor joists and footings. These galvanized metal beams can be tightened over time to straighten and stabilize your bowing basement walls, preventing further damage and avoiding a costly full foundation replacement. Both these systems are backed by product and service warranties and a transferable lifetime guarantee.

Foundation Replacement

Foundation replacement is typically required when a home’s structural integrity is seriously compromised. This may be indicated by a large number of cracks in the basement walls, doors that are difficult to open or close, gaps developing in trim work, and/or serious sinking or tilting of the building.

When this type of problem is detected, a professional will often develop a plan to reinforce the foundation and reposition the building back into its original position. During this process, the foundation will be jacked up with hydraulic piers that are installed at strategic points underneath the building’s structure. These devices, which vary in size and shape (i.e. resistance push piers, helical piers, or slab piers), are designed to transfer the building’s weight from the unstable soil into the deeper, load-bearing soil or bedrock.

These types of permanent repairs can be the best way to stabilize a house’s foundation but are also the most expensive. This is because they involve digging underneath the home to install the support system, which requires extensive excavation work, and then pumping concrete or helical steel into the ground to reach the load-bearing soils or bedrock. For this reason, it is best to leave the job of repairing and replacing your foundation to a professional who can ensure that the new repair method adequately addresses the root cause of your problem. These professionals are typically able to provide long-term, cost-effective solutions by using engineered steel piering systems that can go much deeper than traditional methods.